
Digital machine — detailed setup guide
Machines are the foundation of every costing — which is why setup runs as a wizard that walks you through step by step. A digital machine takes 12 steps (plus one extra if it has special color stations), but don't let that scare you: most steps are one or two fields, and AI Scan fills half of them for you.
Start from Machines → New Machine → Digital.
Step 2 — Model & AI Scan
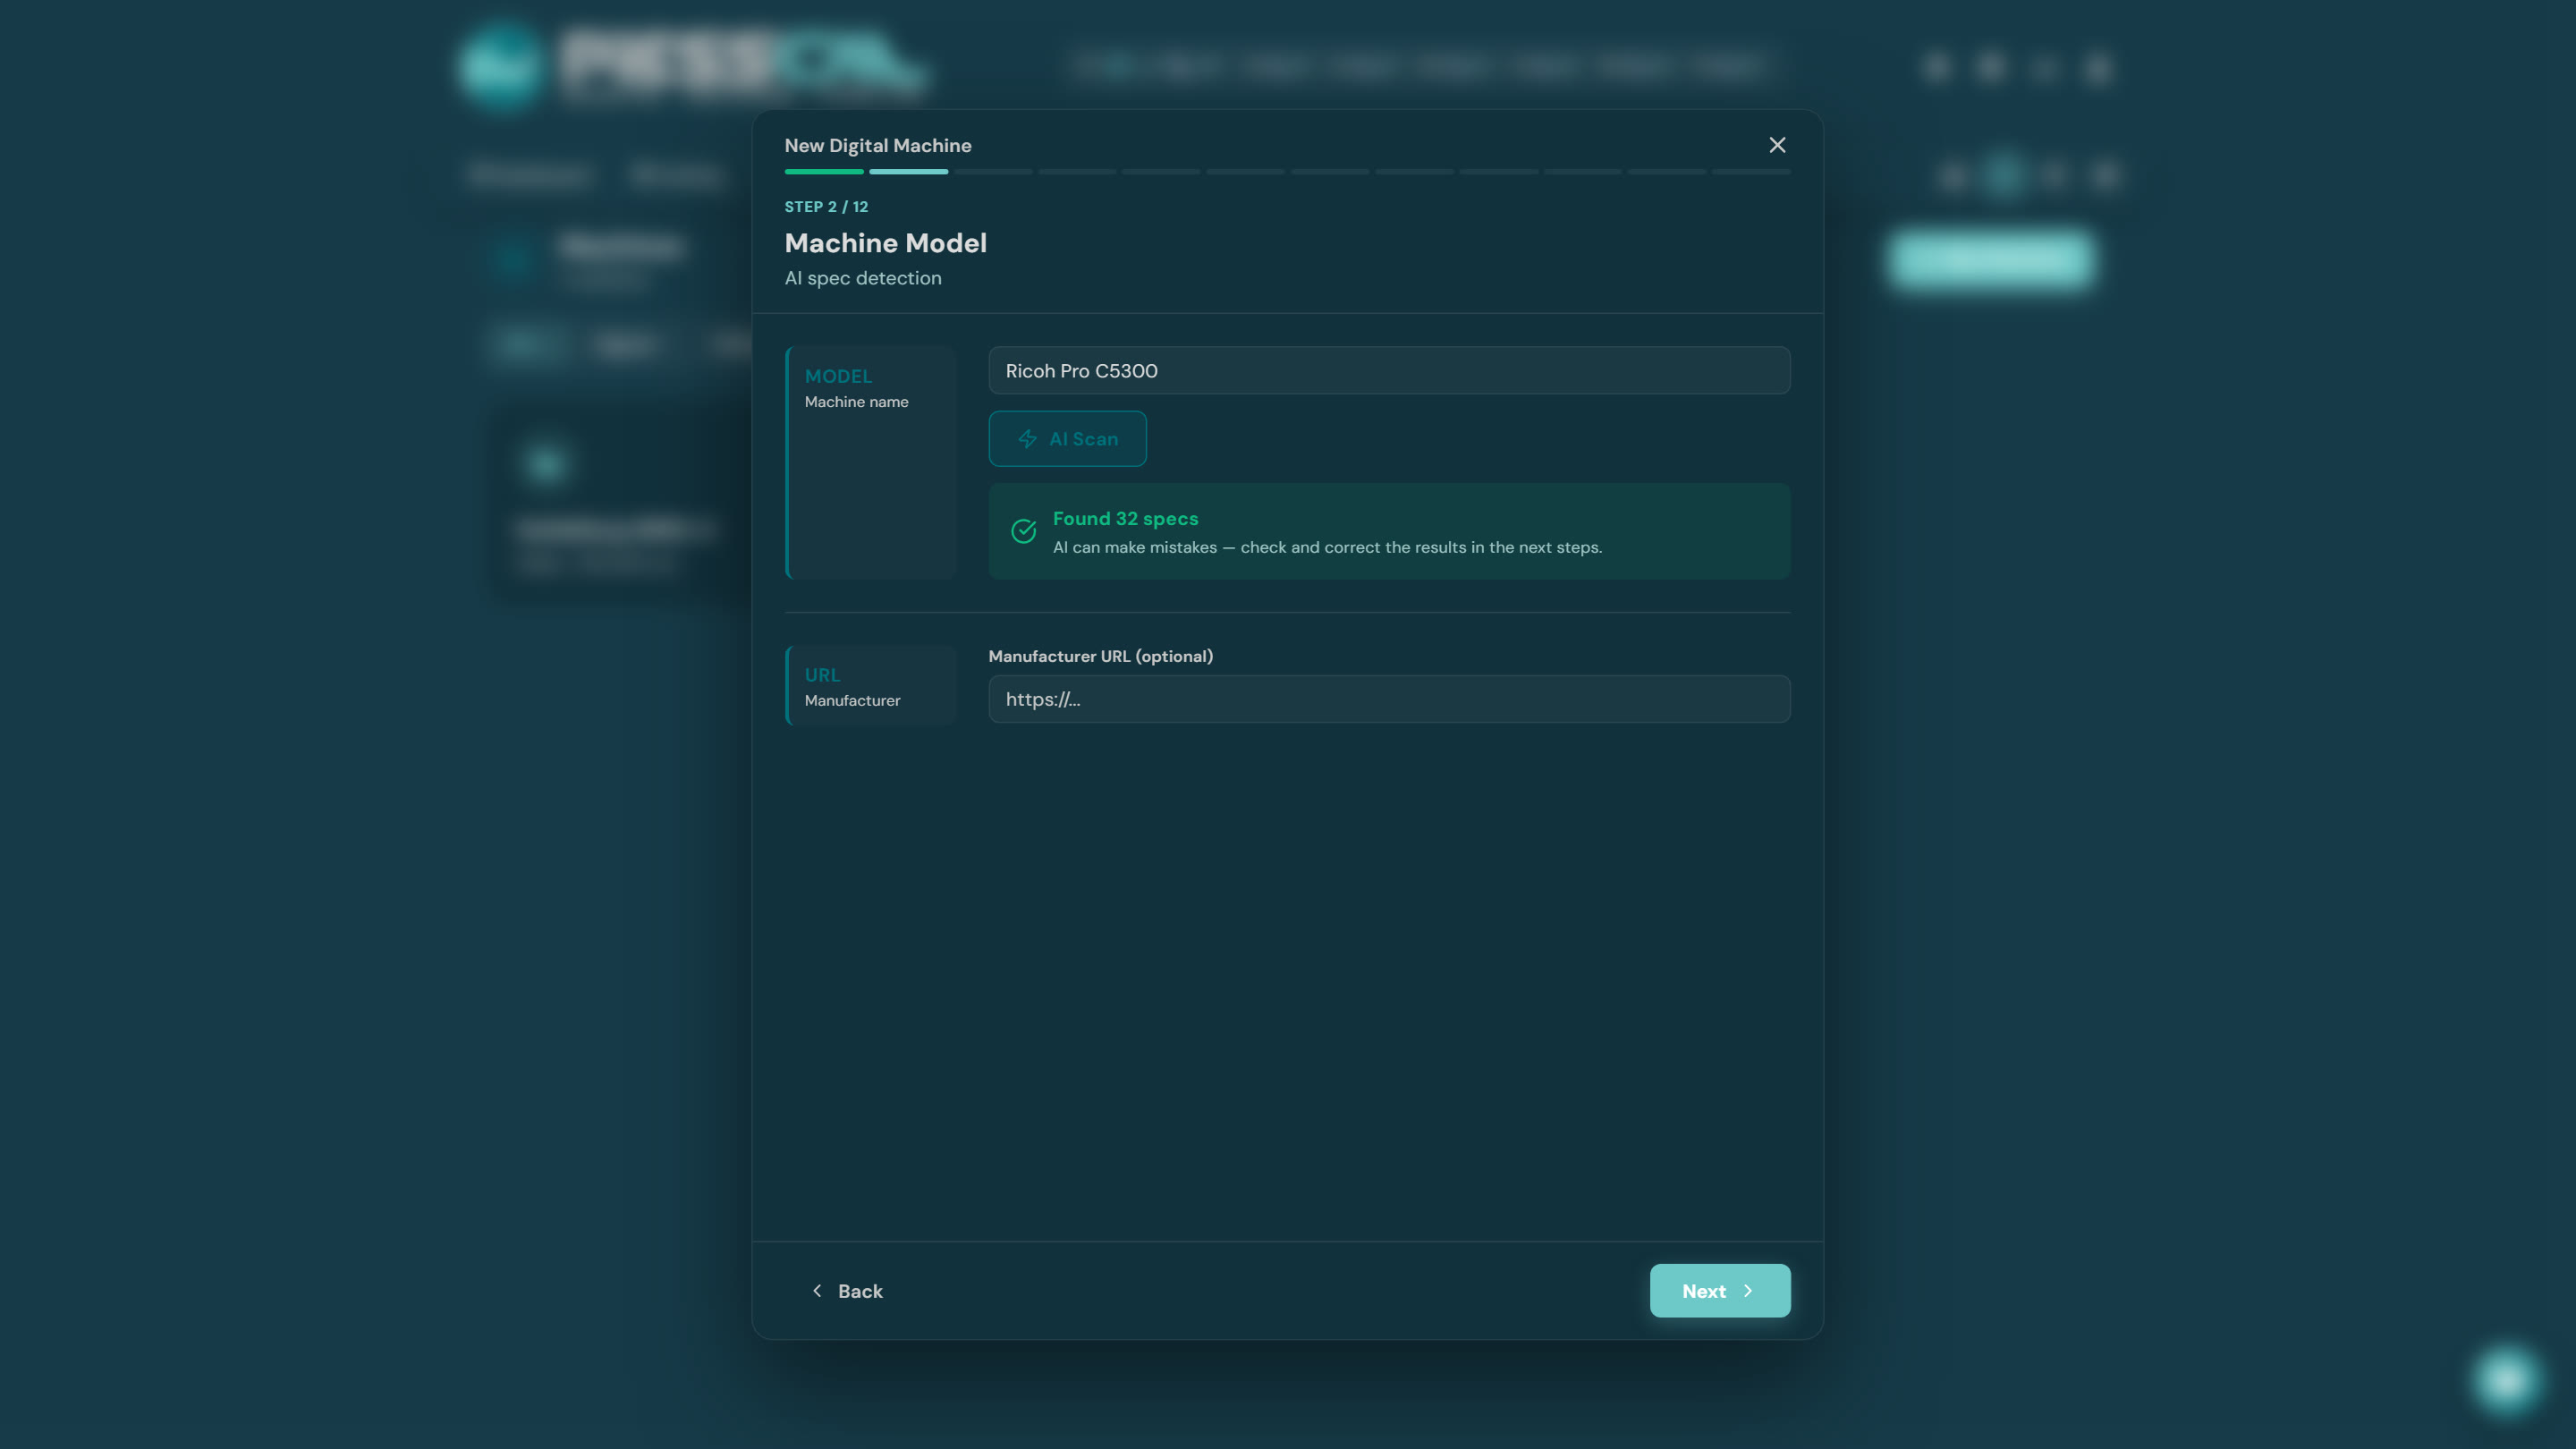
Type the model (e.g. "Ricoh Pro C5300") and hit AI Scan: PressCal finds the technical specs — 32 of them here — and pre-fills the next steps. You just review and correct where you know better. AI can make mistakes, which is why every value it sets stays in front of you, editable.
Step 3 — Ink type
Toner (most laser machines: Konica, Ricoh, Xerox, Canon) or Liquid Ink (HP Indigo, Riso). This is the most consequential choice in the wizard because it changes how costs are calculated — if you run an Indigo or a Riso, see the separate "Liquid ink" guide.
Step 4 — Technical specs
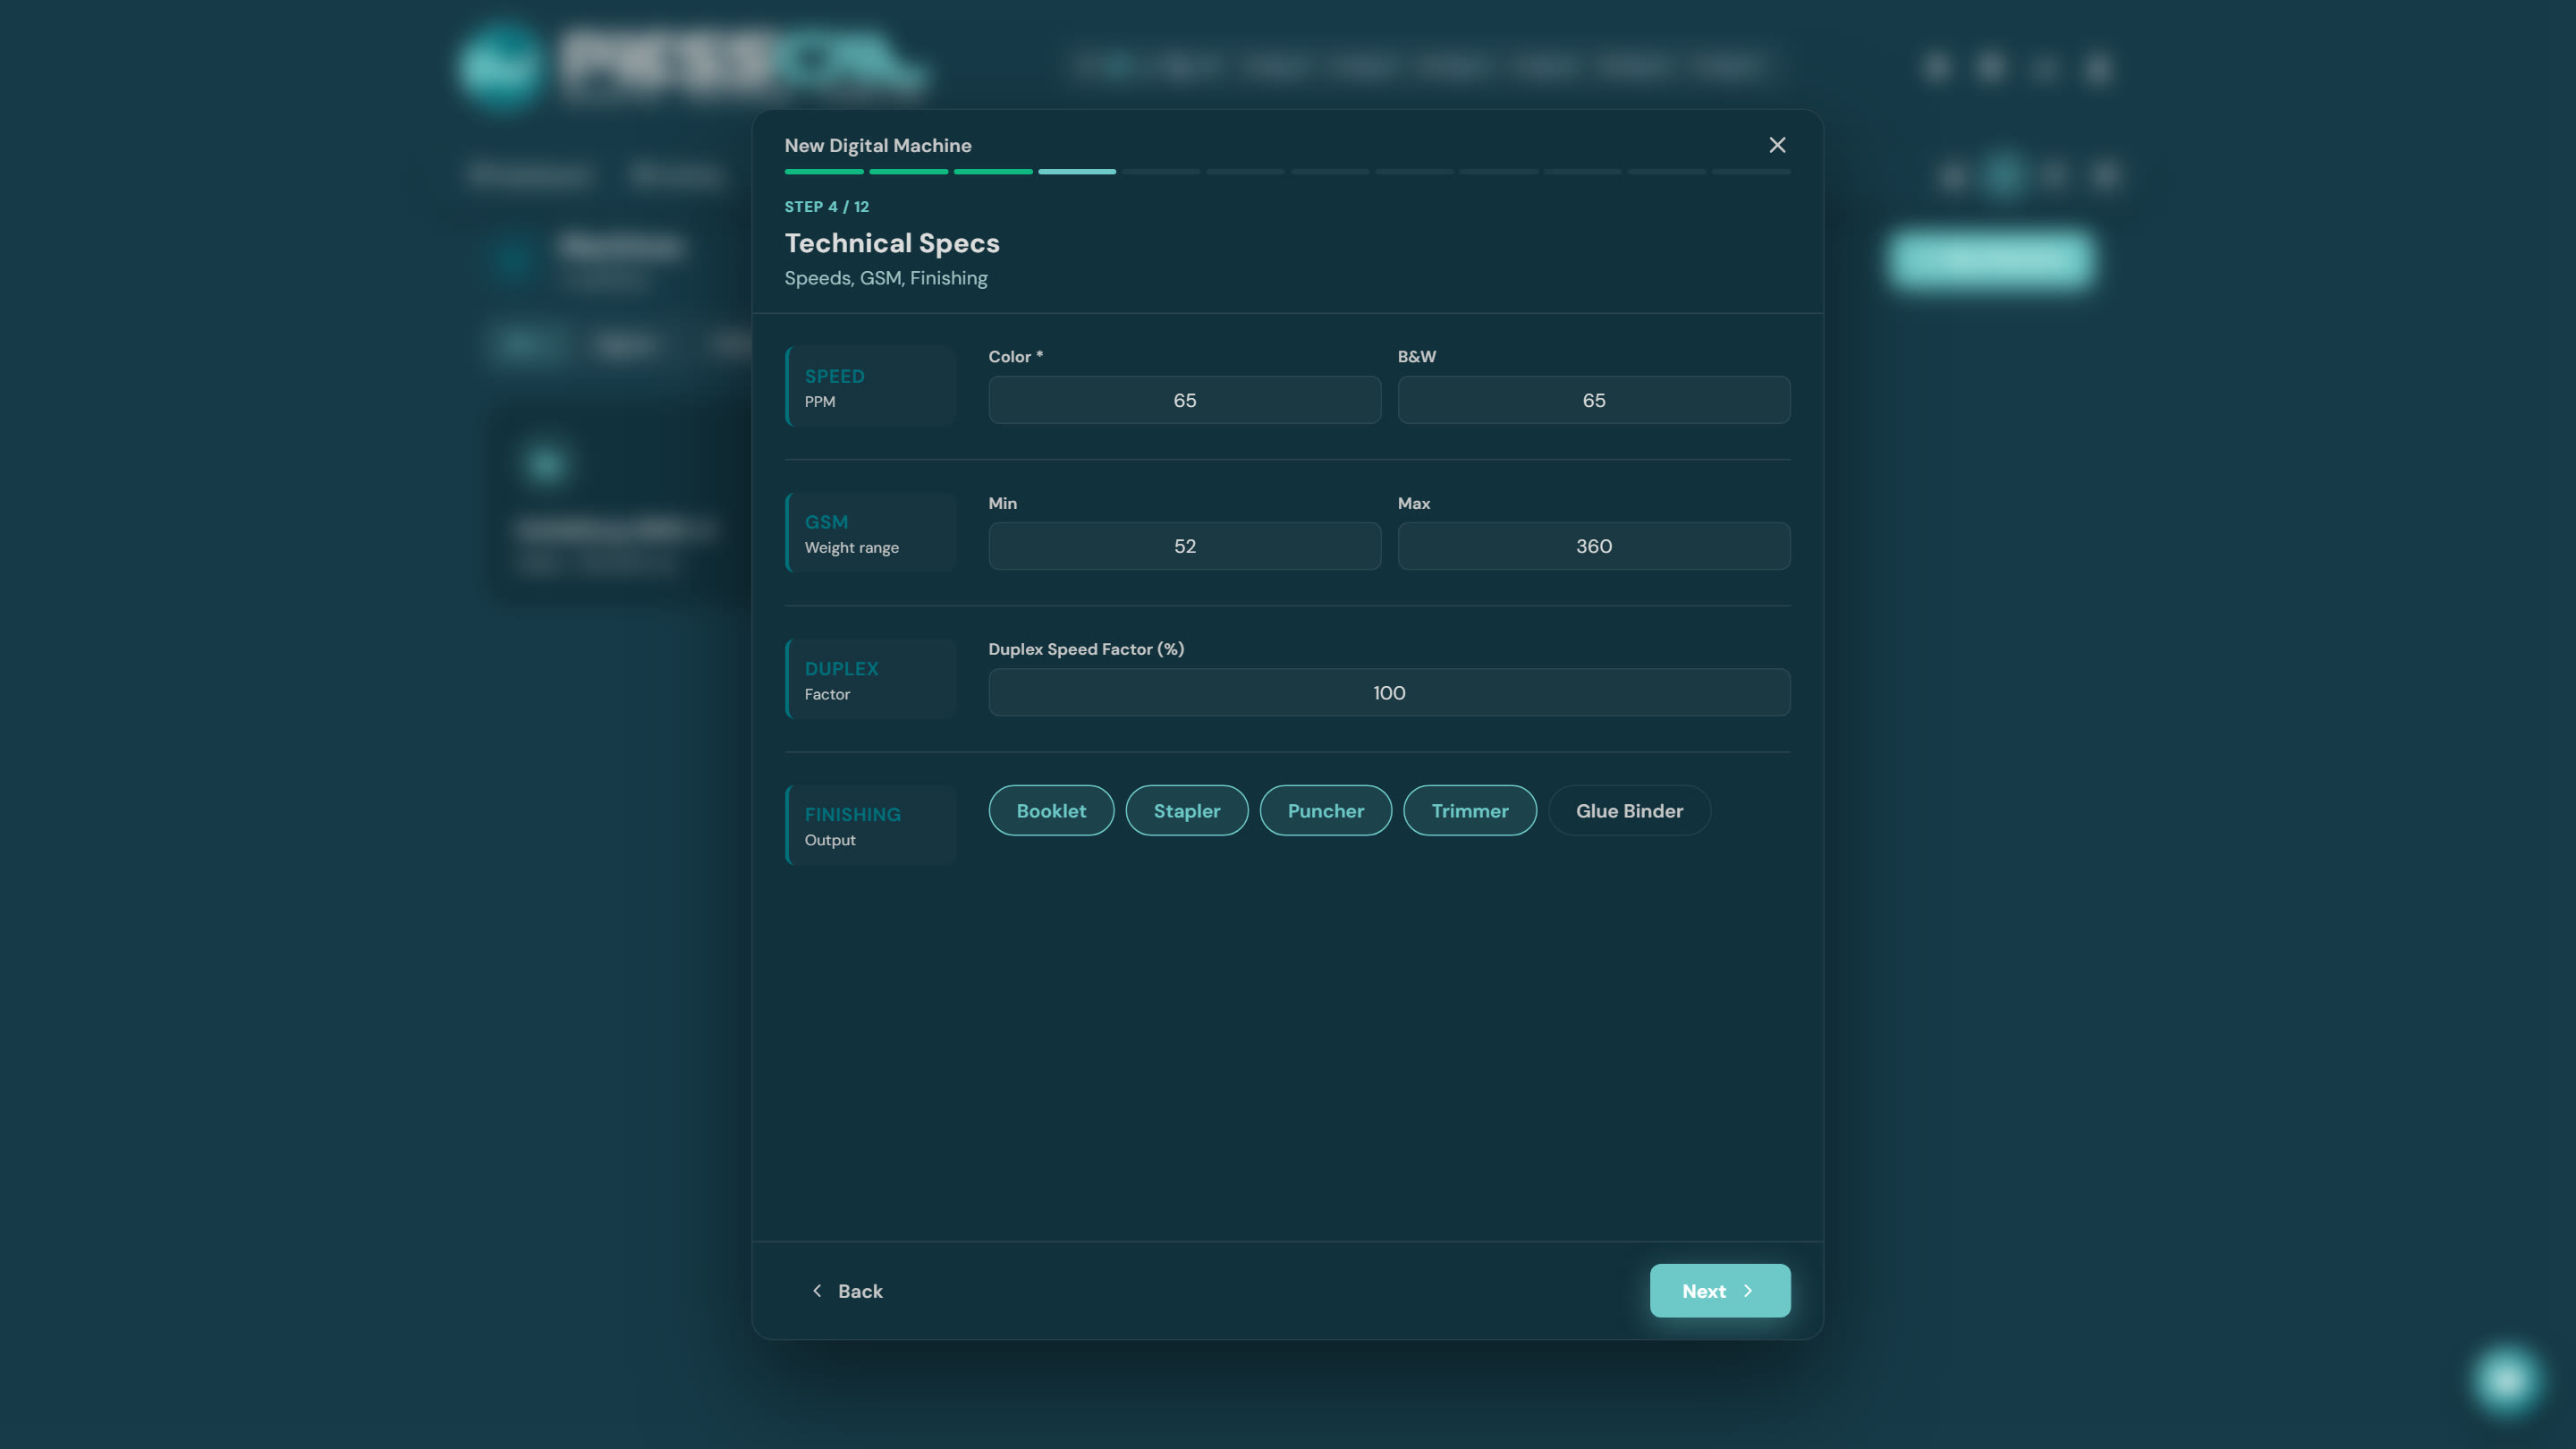
Speed in pages per minute (color and B&W), the paper weight range, how much duplex slows the machine down, and built-in finishing (booklet maker, stapler, puncher, trimmer). In the example AI Scan already got them right: 65 ppm, 52-360 gsm.
Step 5 — Paper dimensions
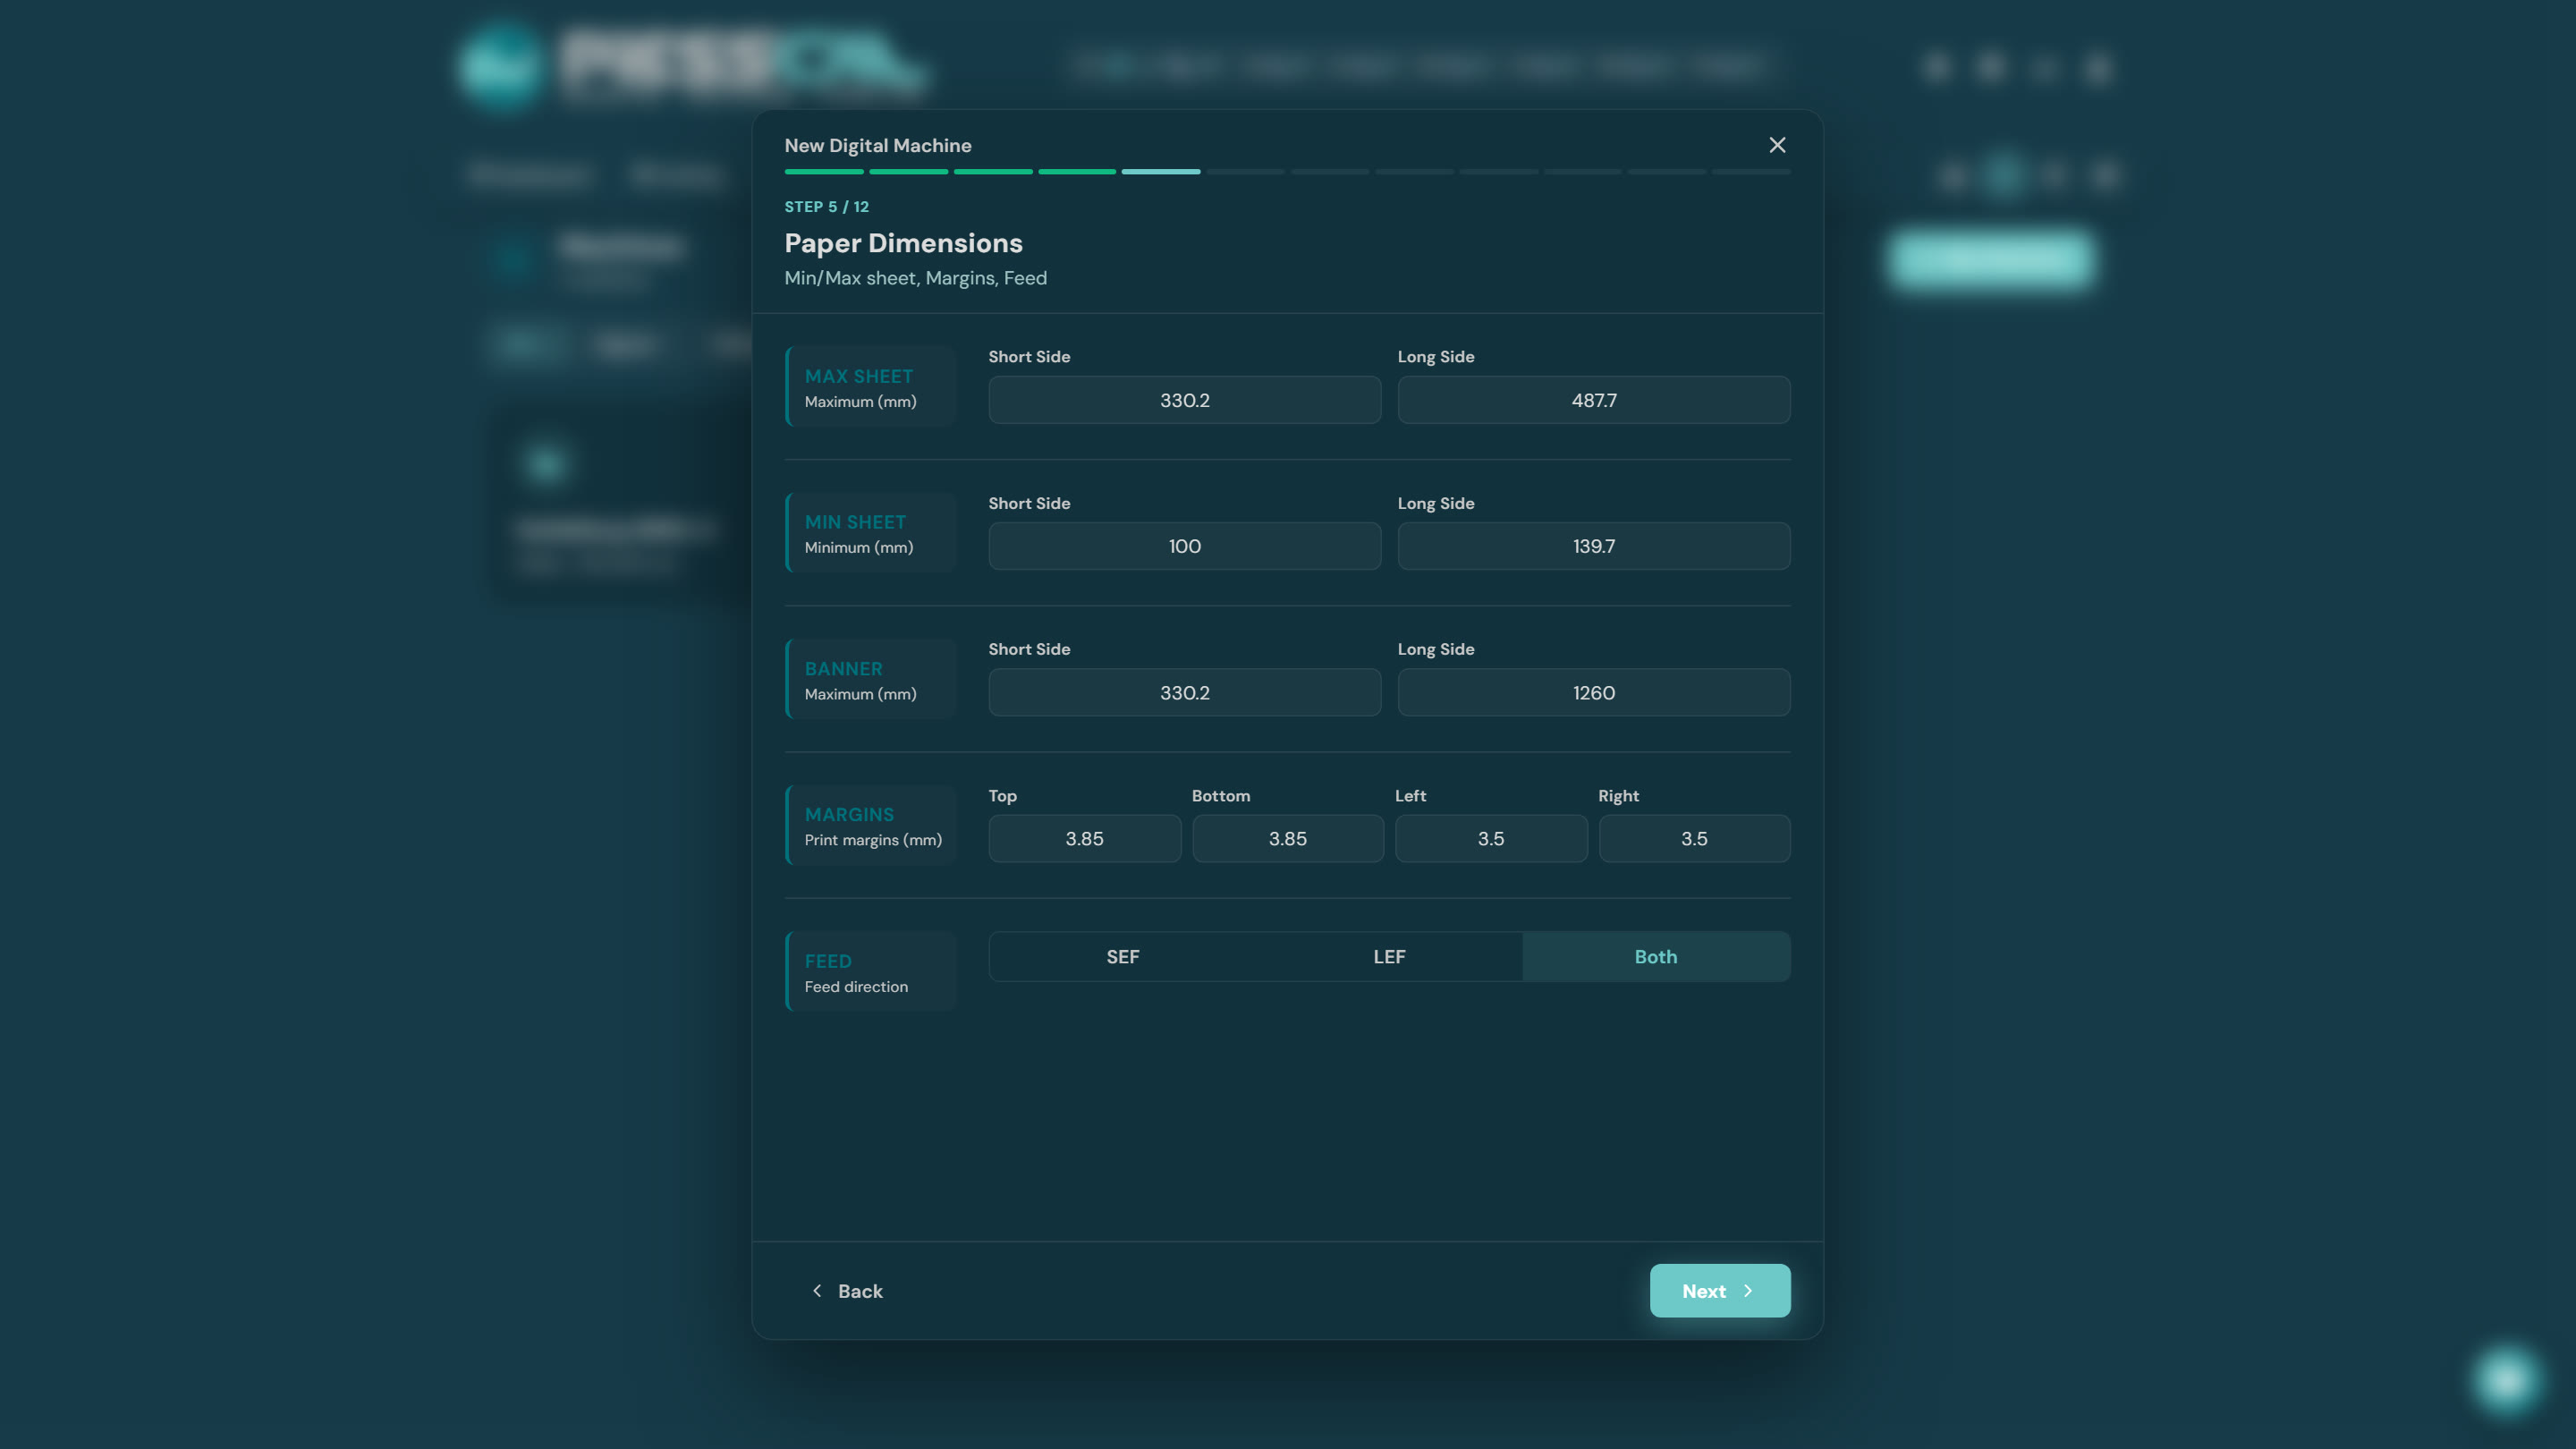
Maximum/minimum sheet in millimetres, banner sizes if supported, print margins, and feed direction: SEF (Short Edge Feed — the sheet enters narrow side first) or LEF. These decide how many pieces fit on the sheet in every imposition, so they deserve a second look.
Step 6 — Colors
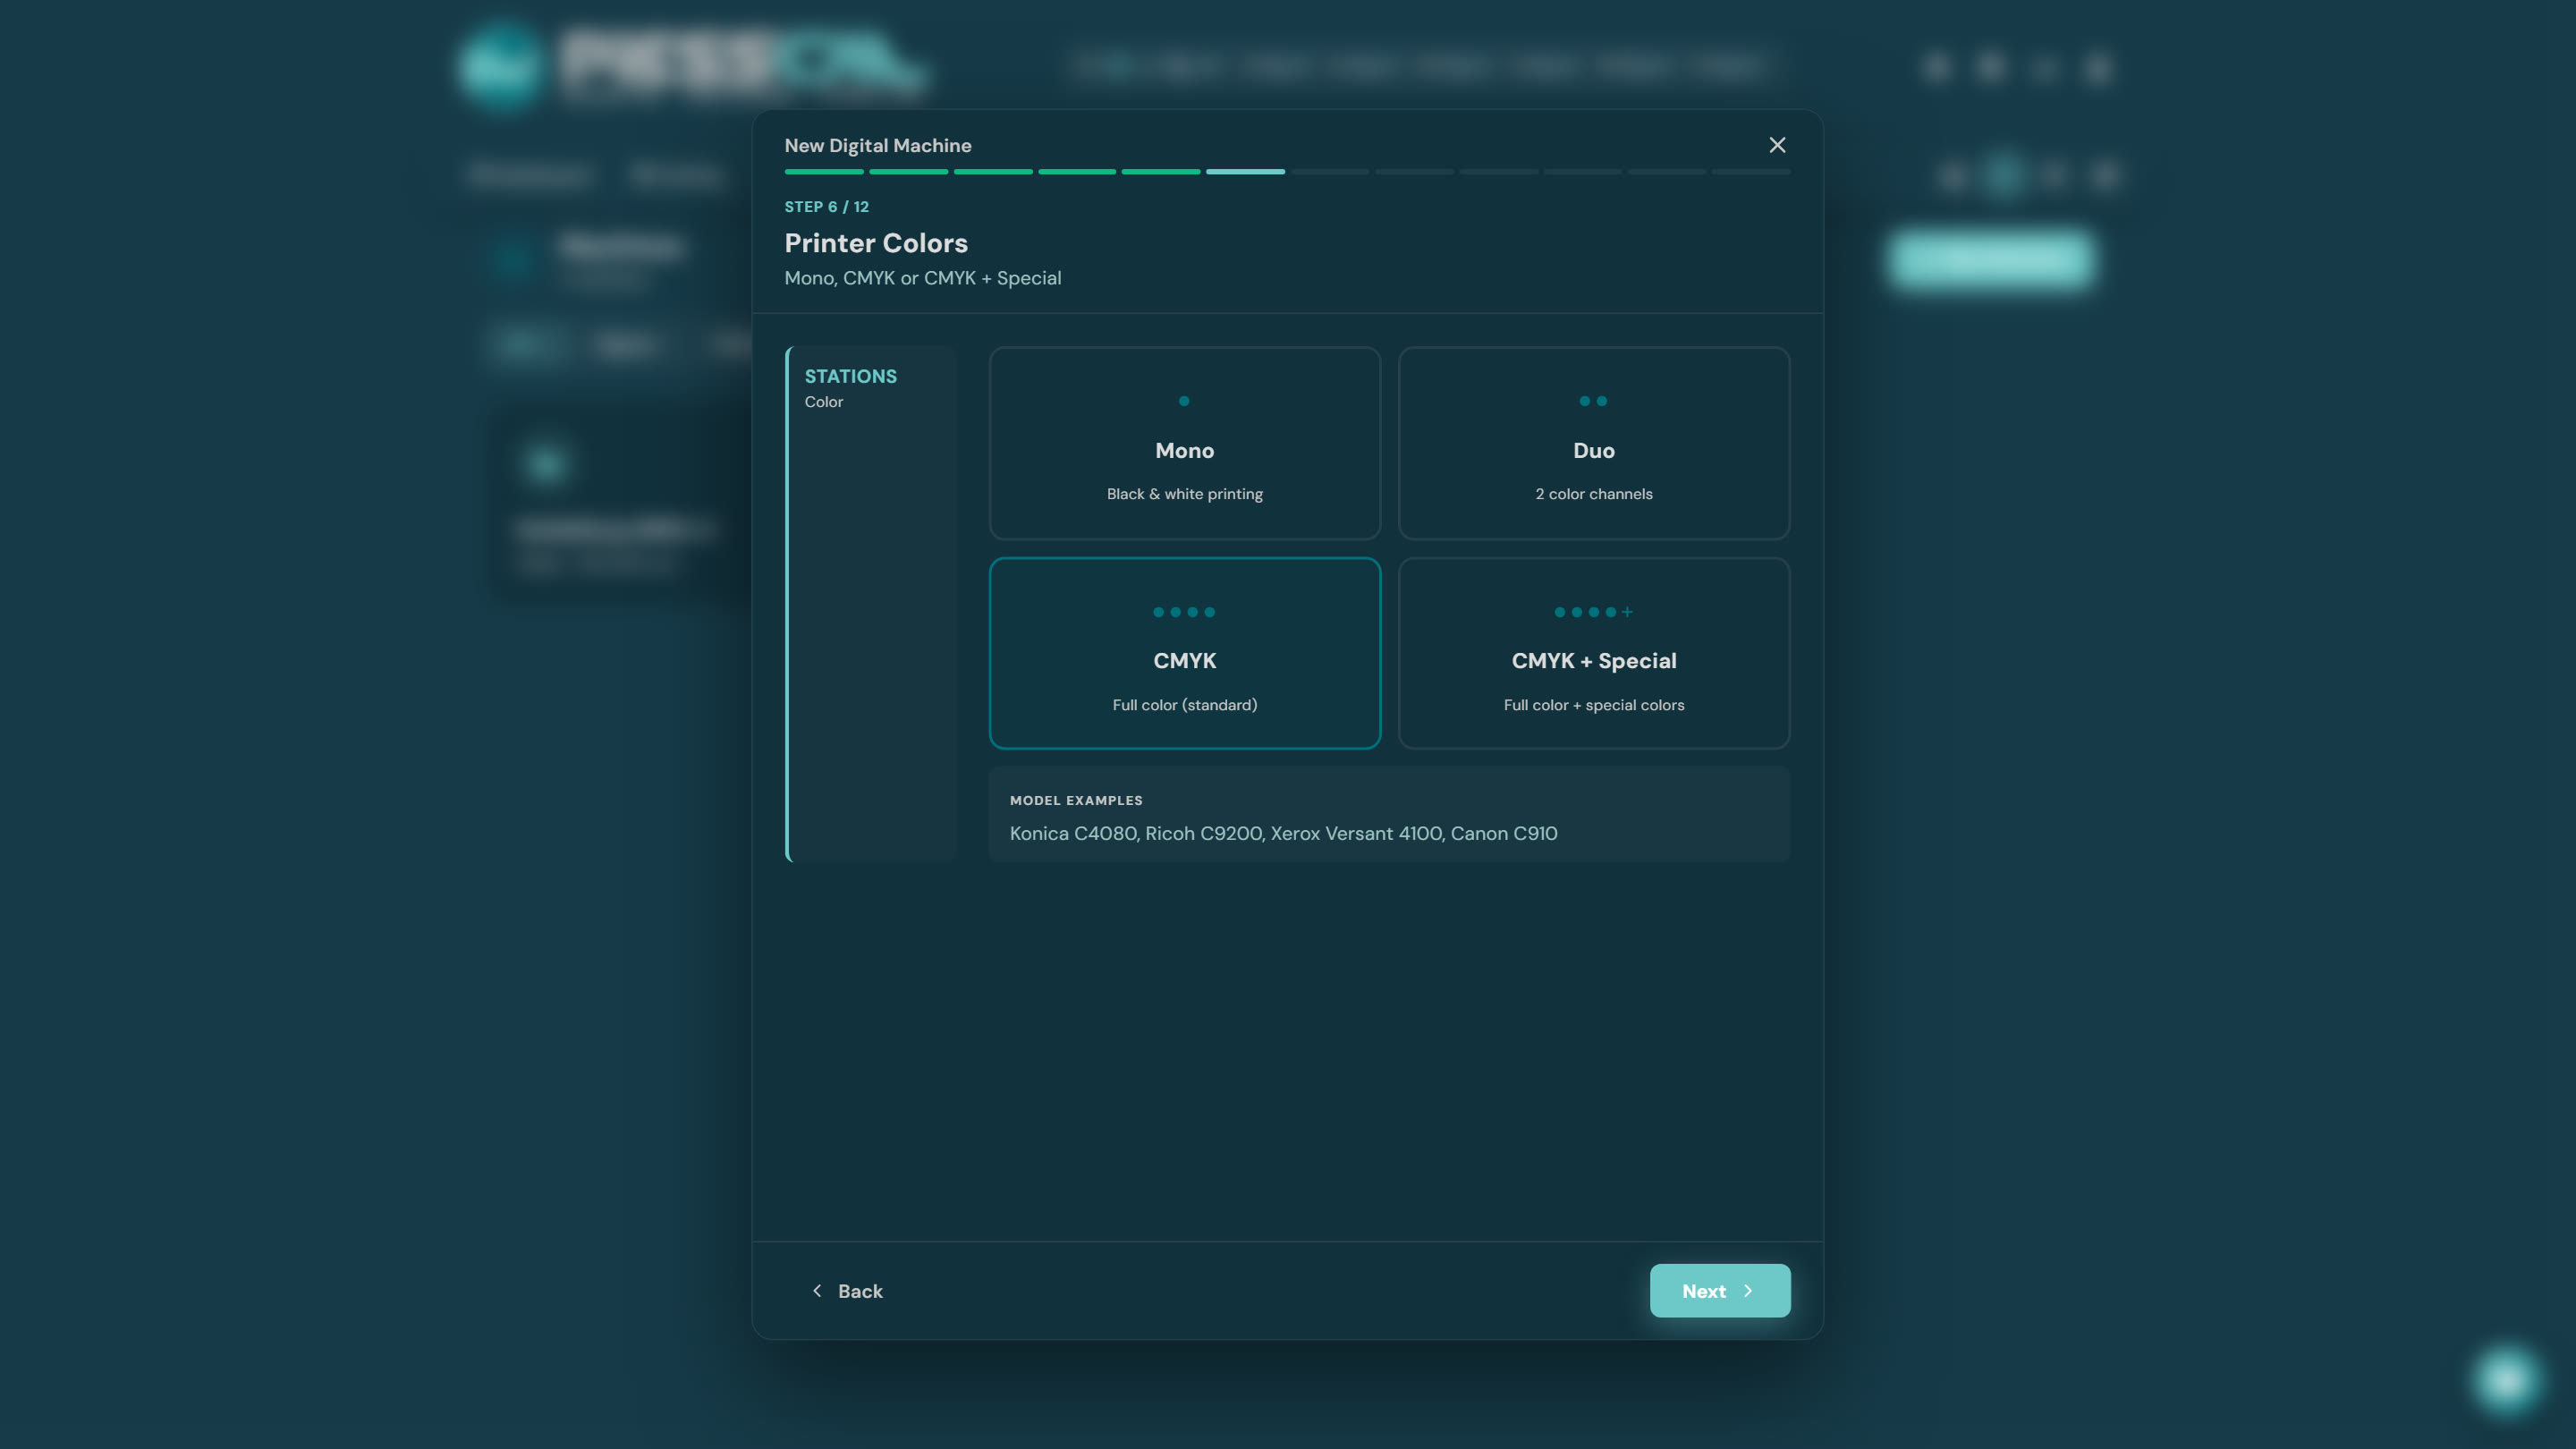
Mono, Duo, CMYK, or CMYK + Special. Under the options you'll see real machine examples for each category. Picking "CMYK + Special" unlocks one extra step — covered in detail in the "Special colors" guide.
Step 7 — Cost model
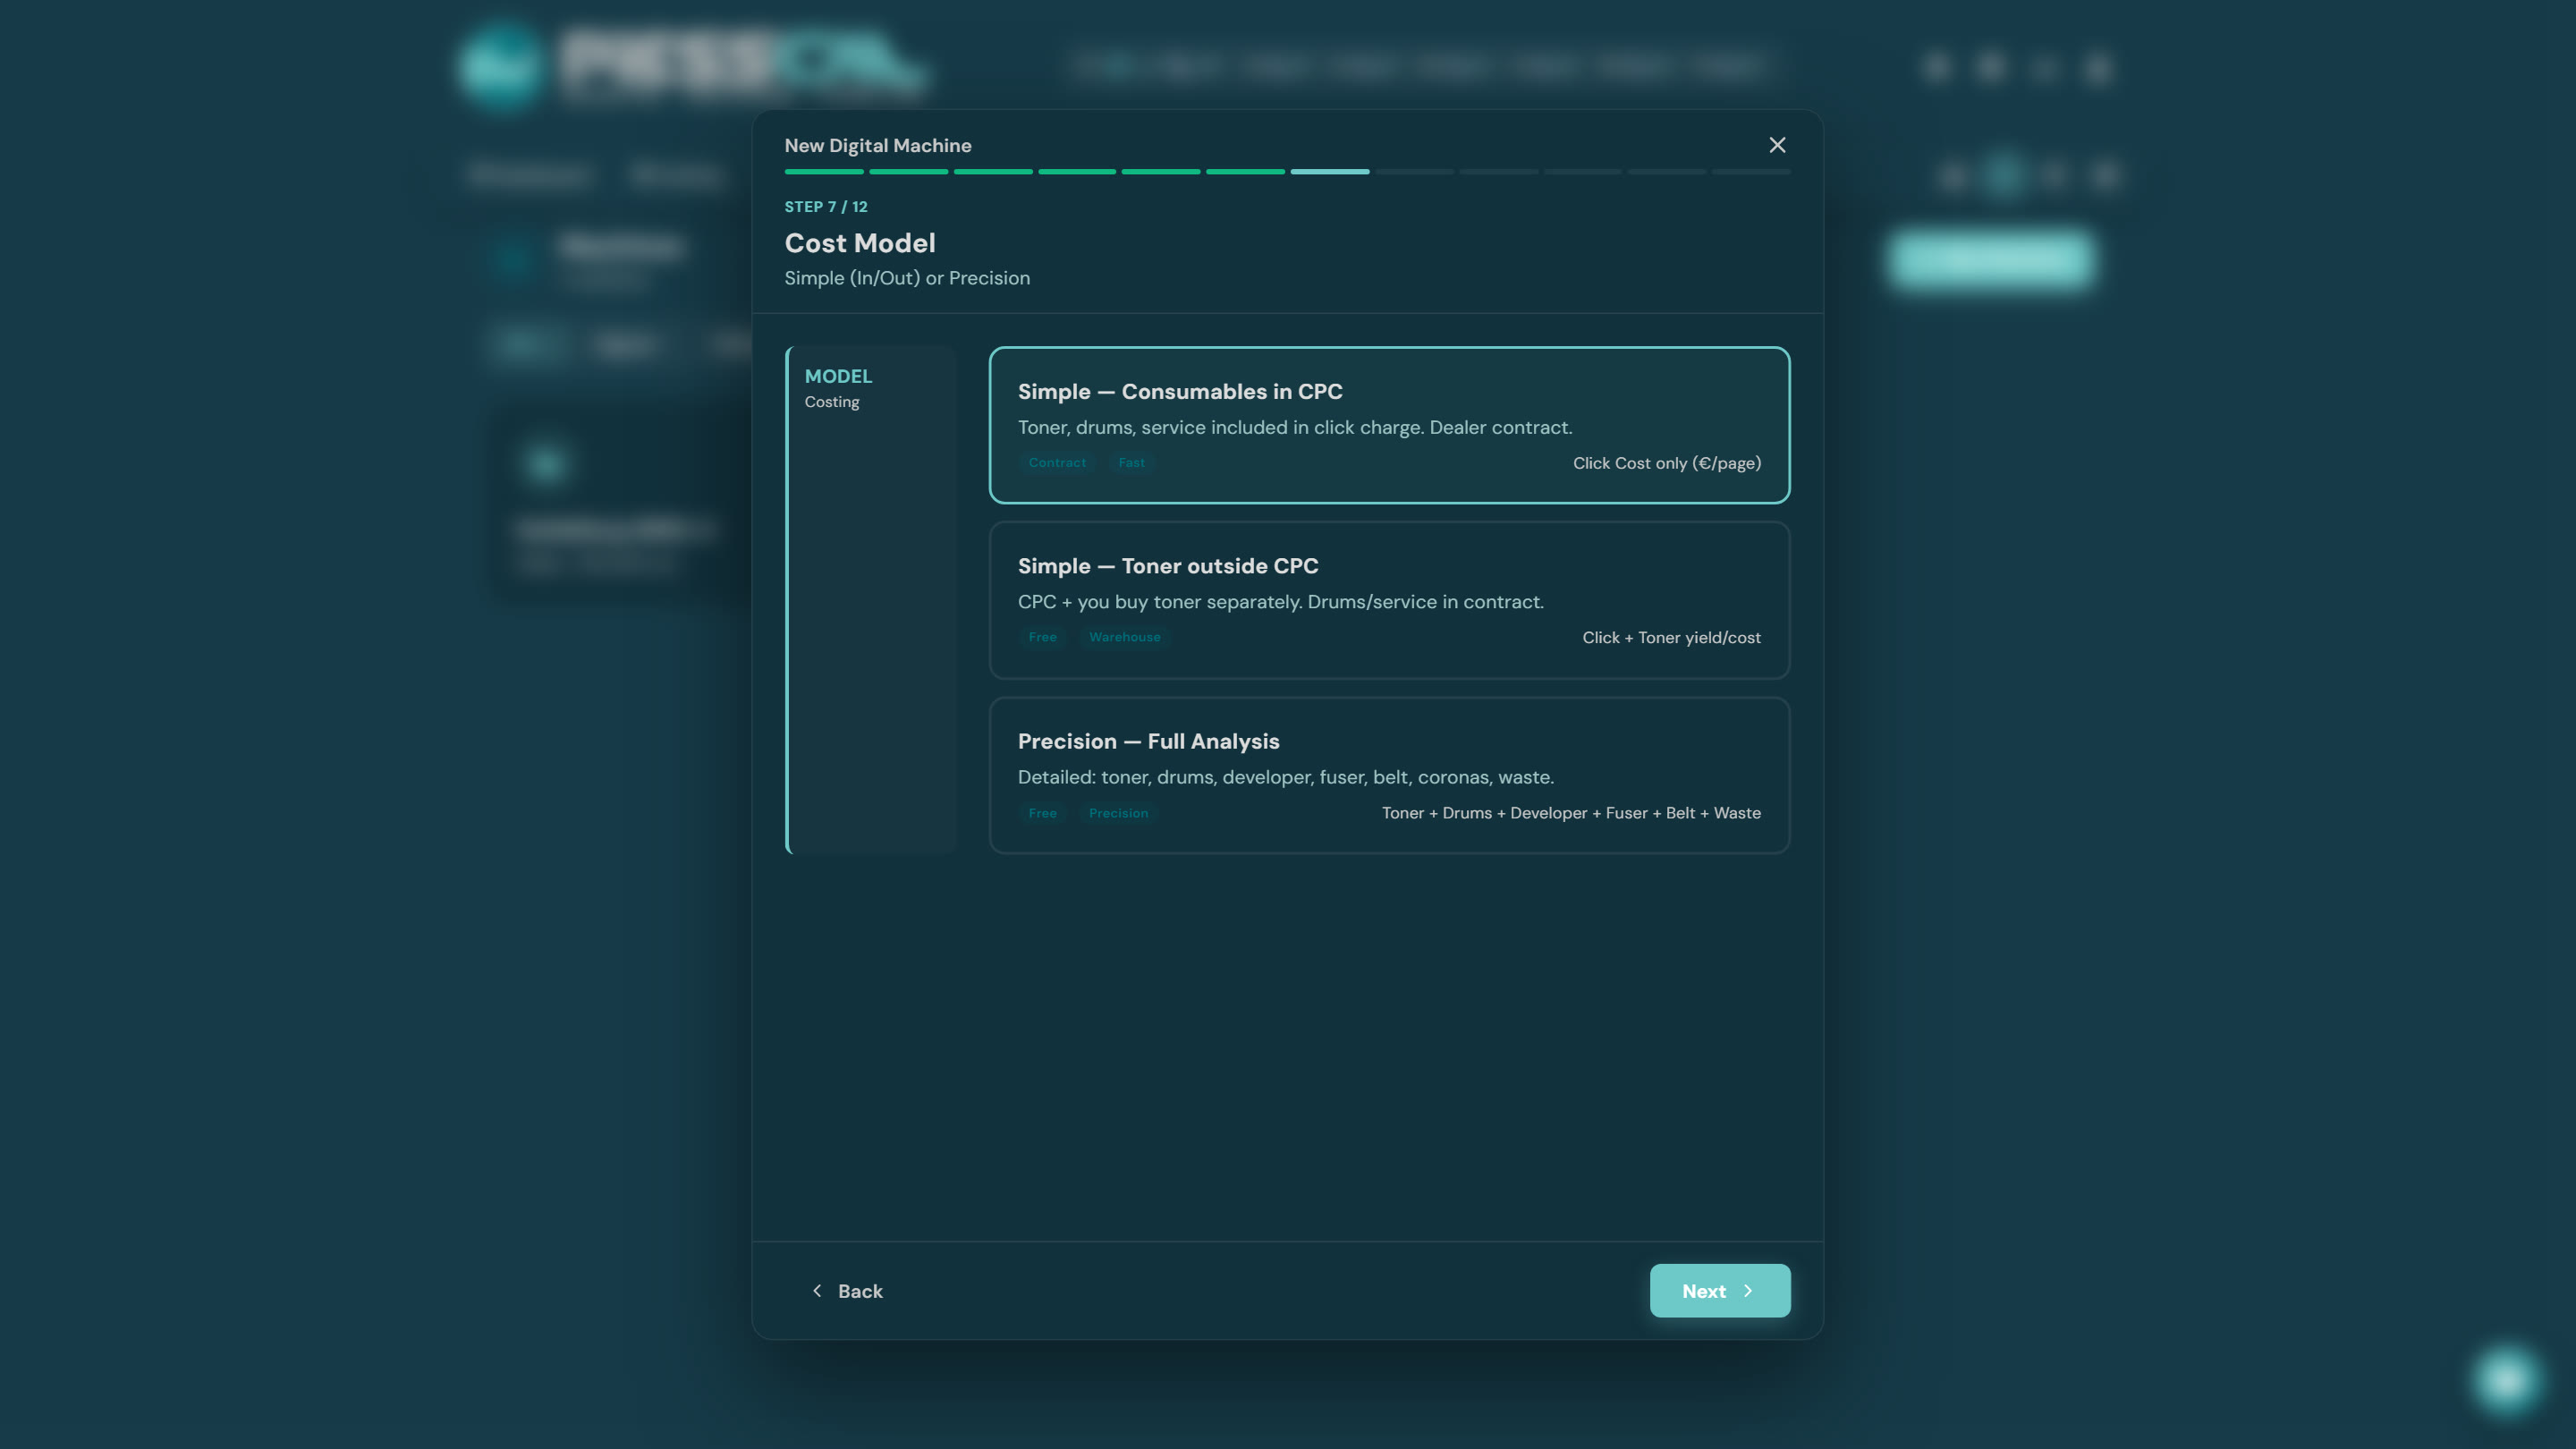
How do you pay for running the machine? Simple with consumables inside the click contract, Simple with toner you buy yourself, or Precision with a full parts analysis. If in doubt, start with the first — you can change it later. Full comparison in "Which cost model should I pick?".
Step 8 — Cost per side
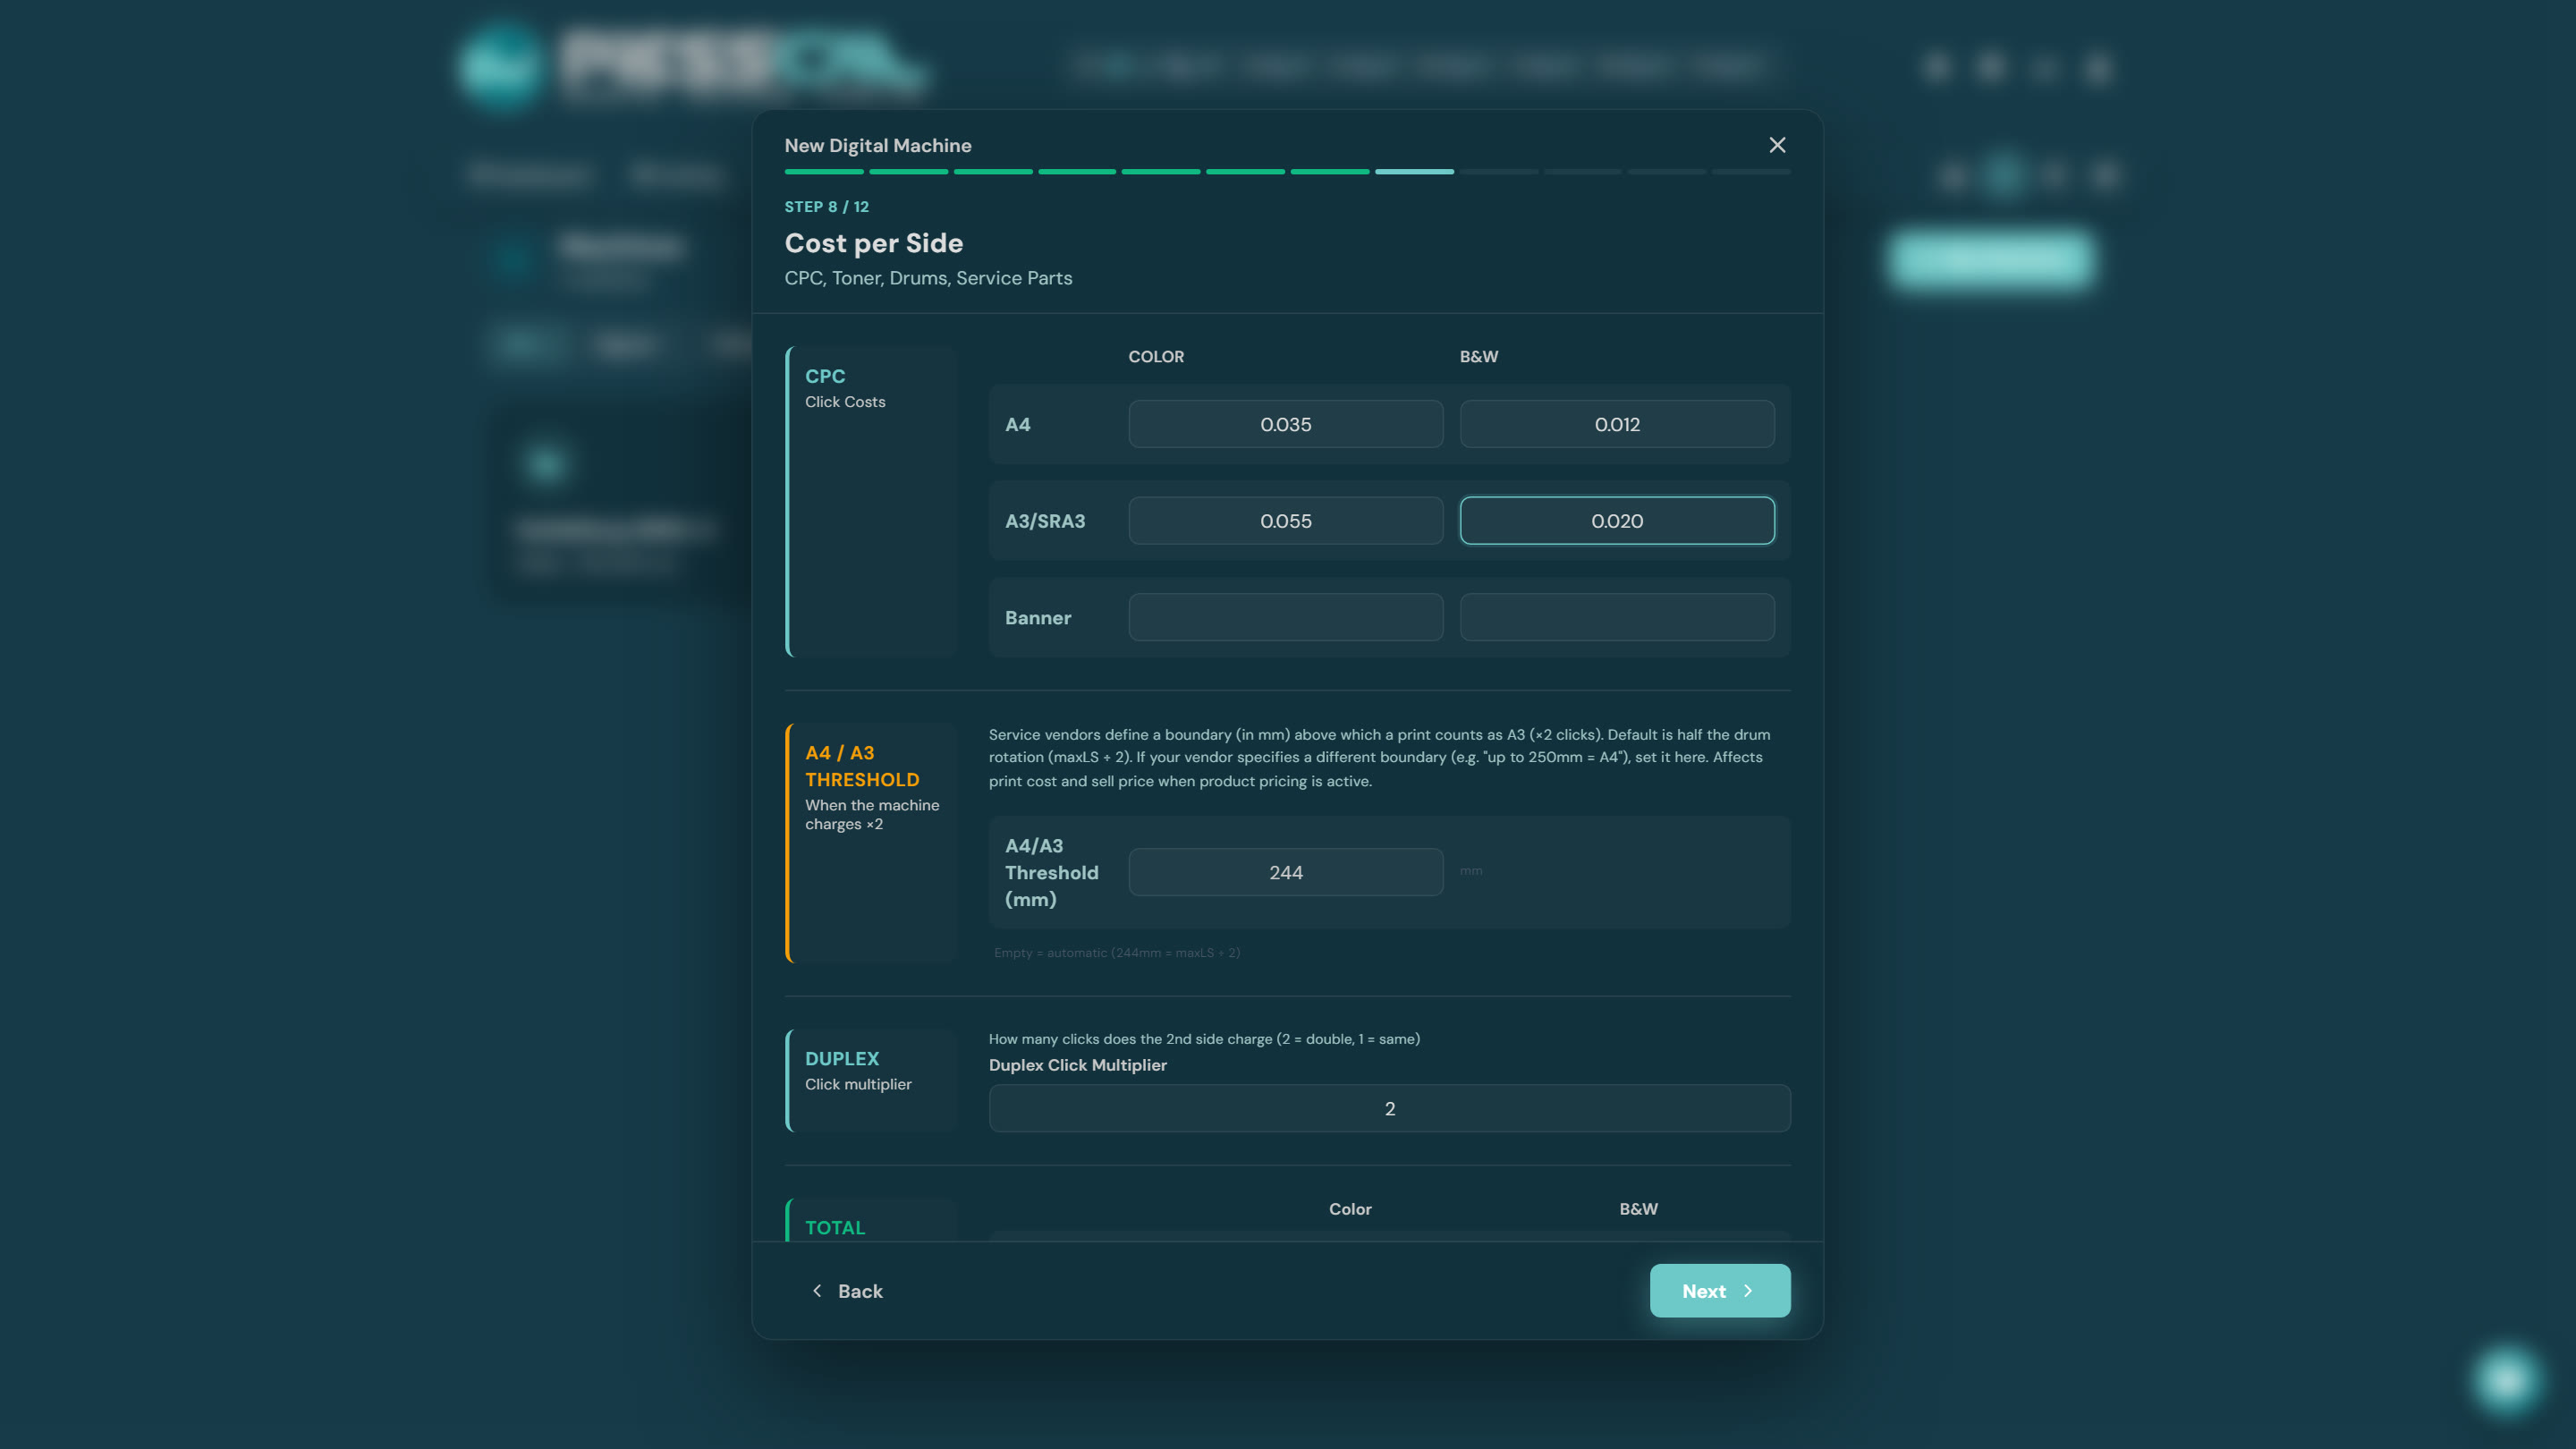
Your contract prices: A4 color/B&W, A3 color/B&W, and banner if charged separately. Watch out for two sneaky fields:
- A4/A3 threshold — the length above which a print counts as A3 (double click). If your contract says "up to 250mm = A4", set it here.
- Duplex multiplier — whether the second side charges a full click (2) or not (1).
Step 9 — Speed zones
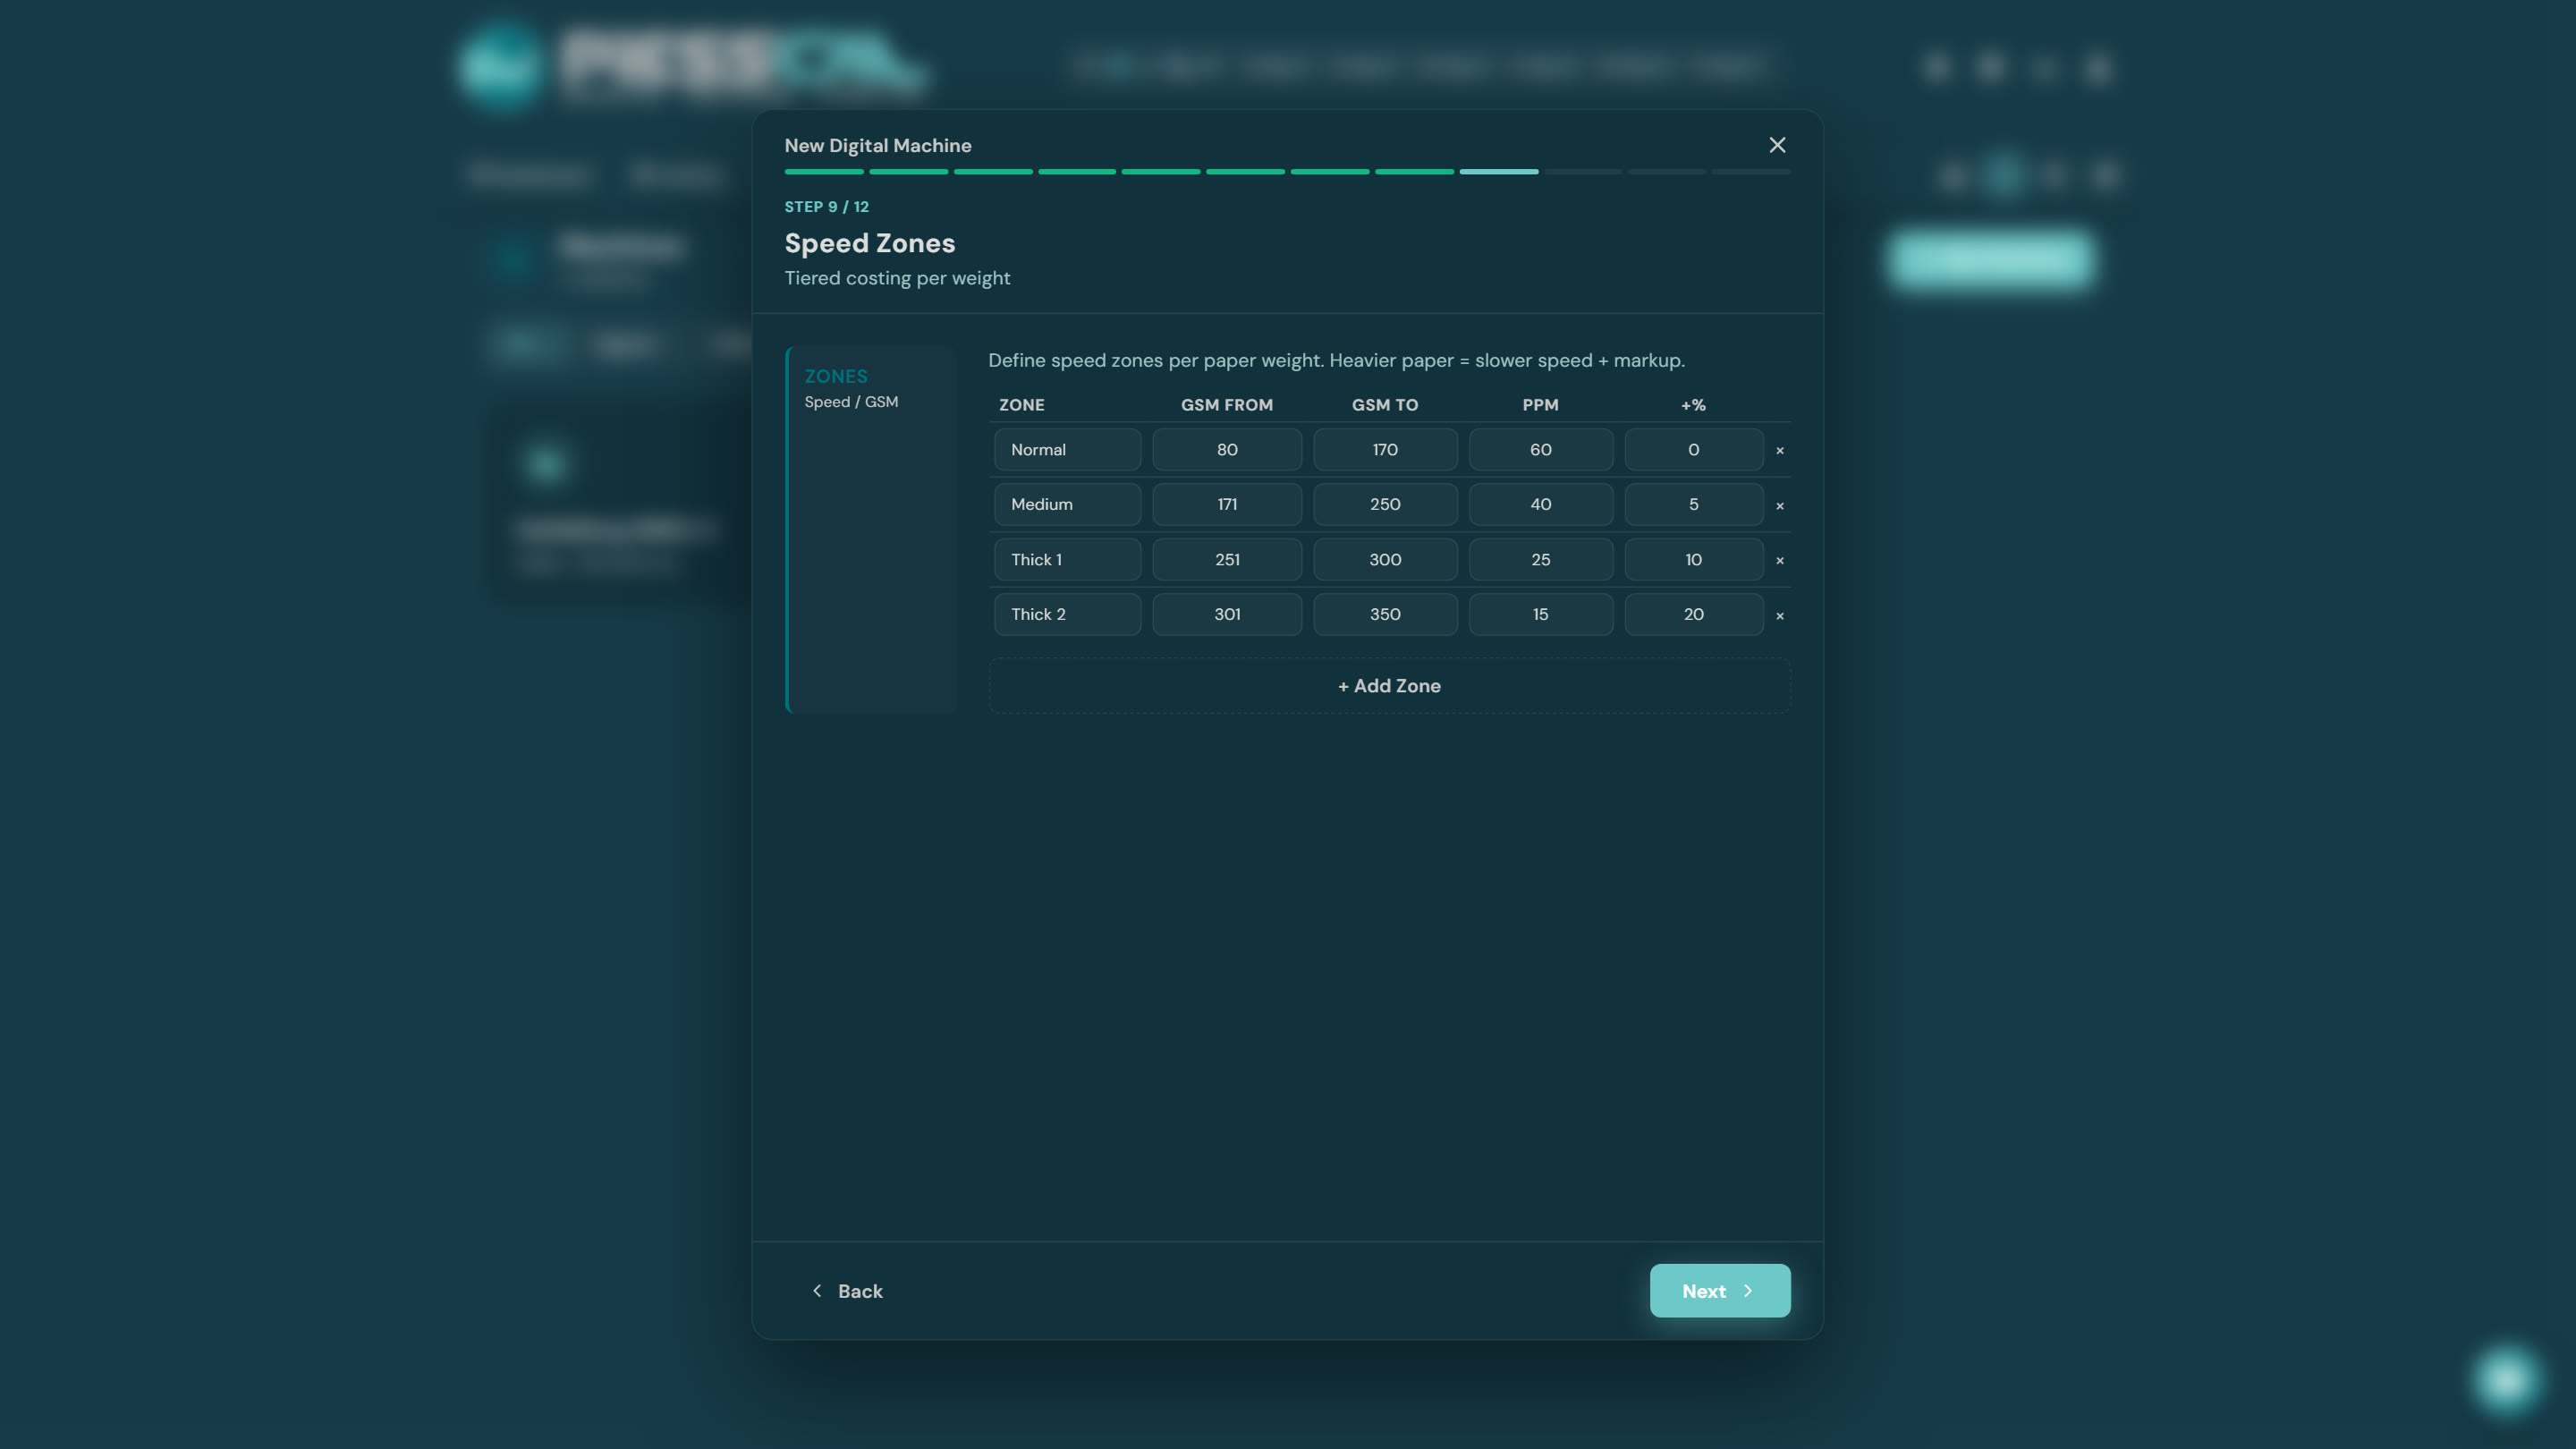
On heavy stock, digital machines slow down — so they cost more per hour of running. Define zones: e.g. Normal 80-170 gsm at full speed, Medium 171-250, Thick 251-350 at reduced speed with a markup. That way the 350gsm business card is priced correctly, not like an 80gsm photocopy.
Step 10 — Production
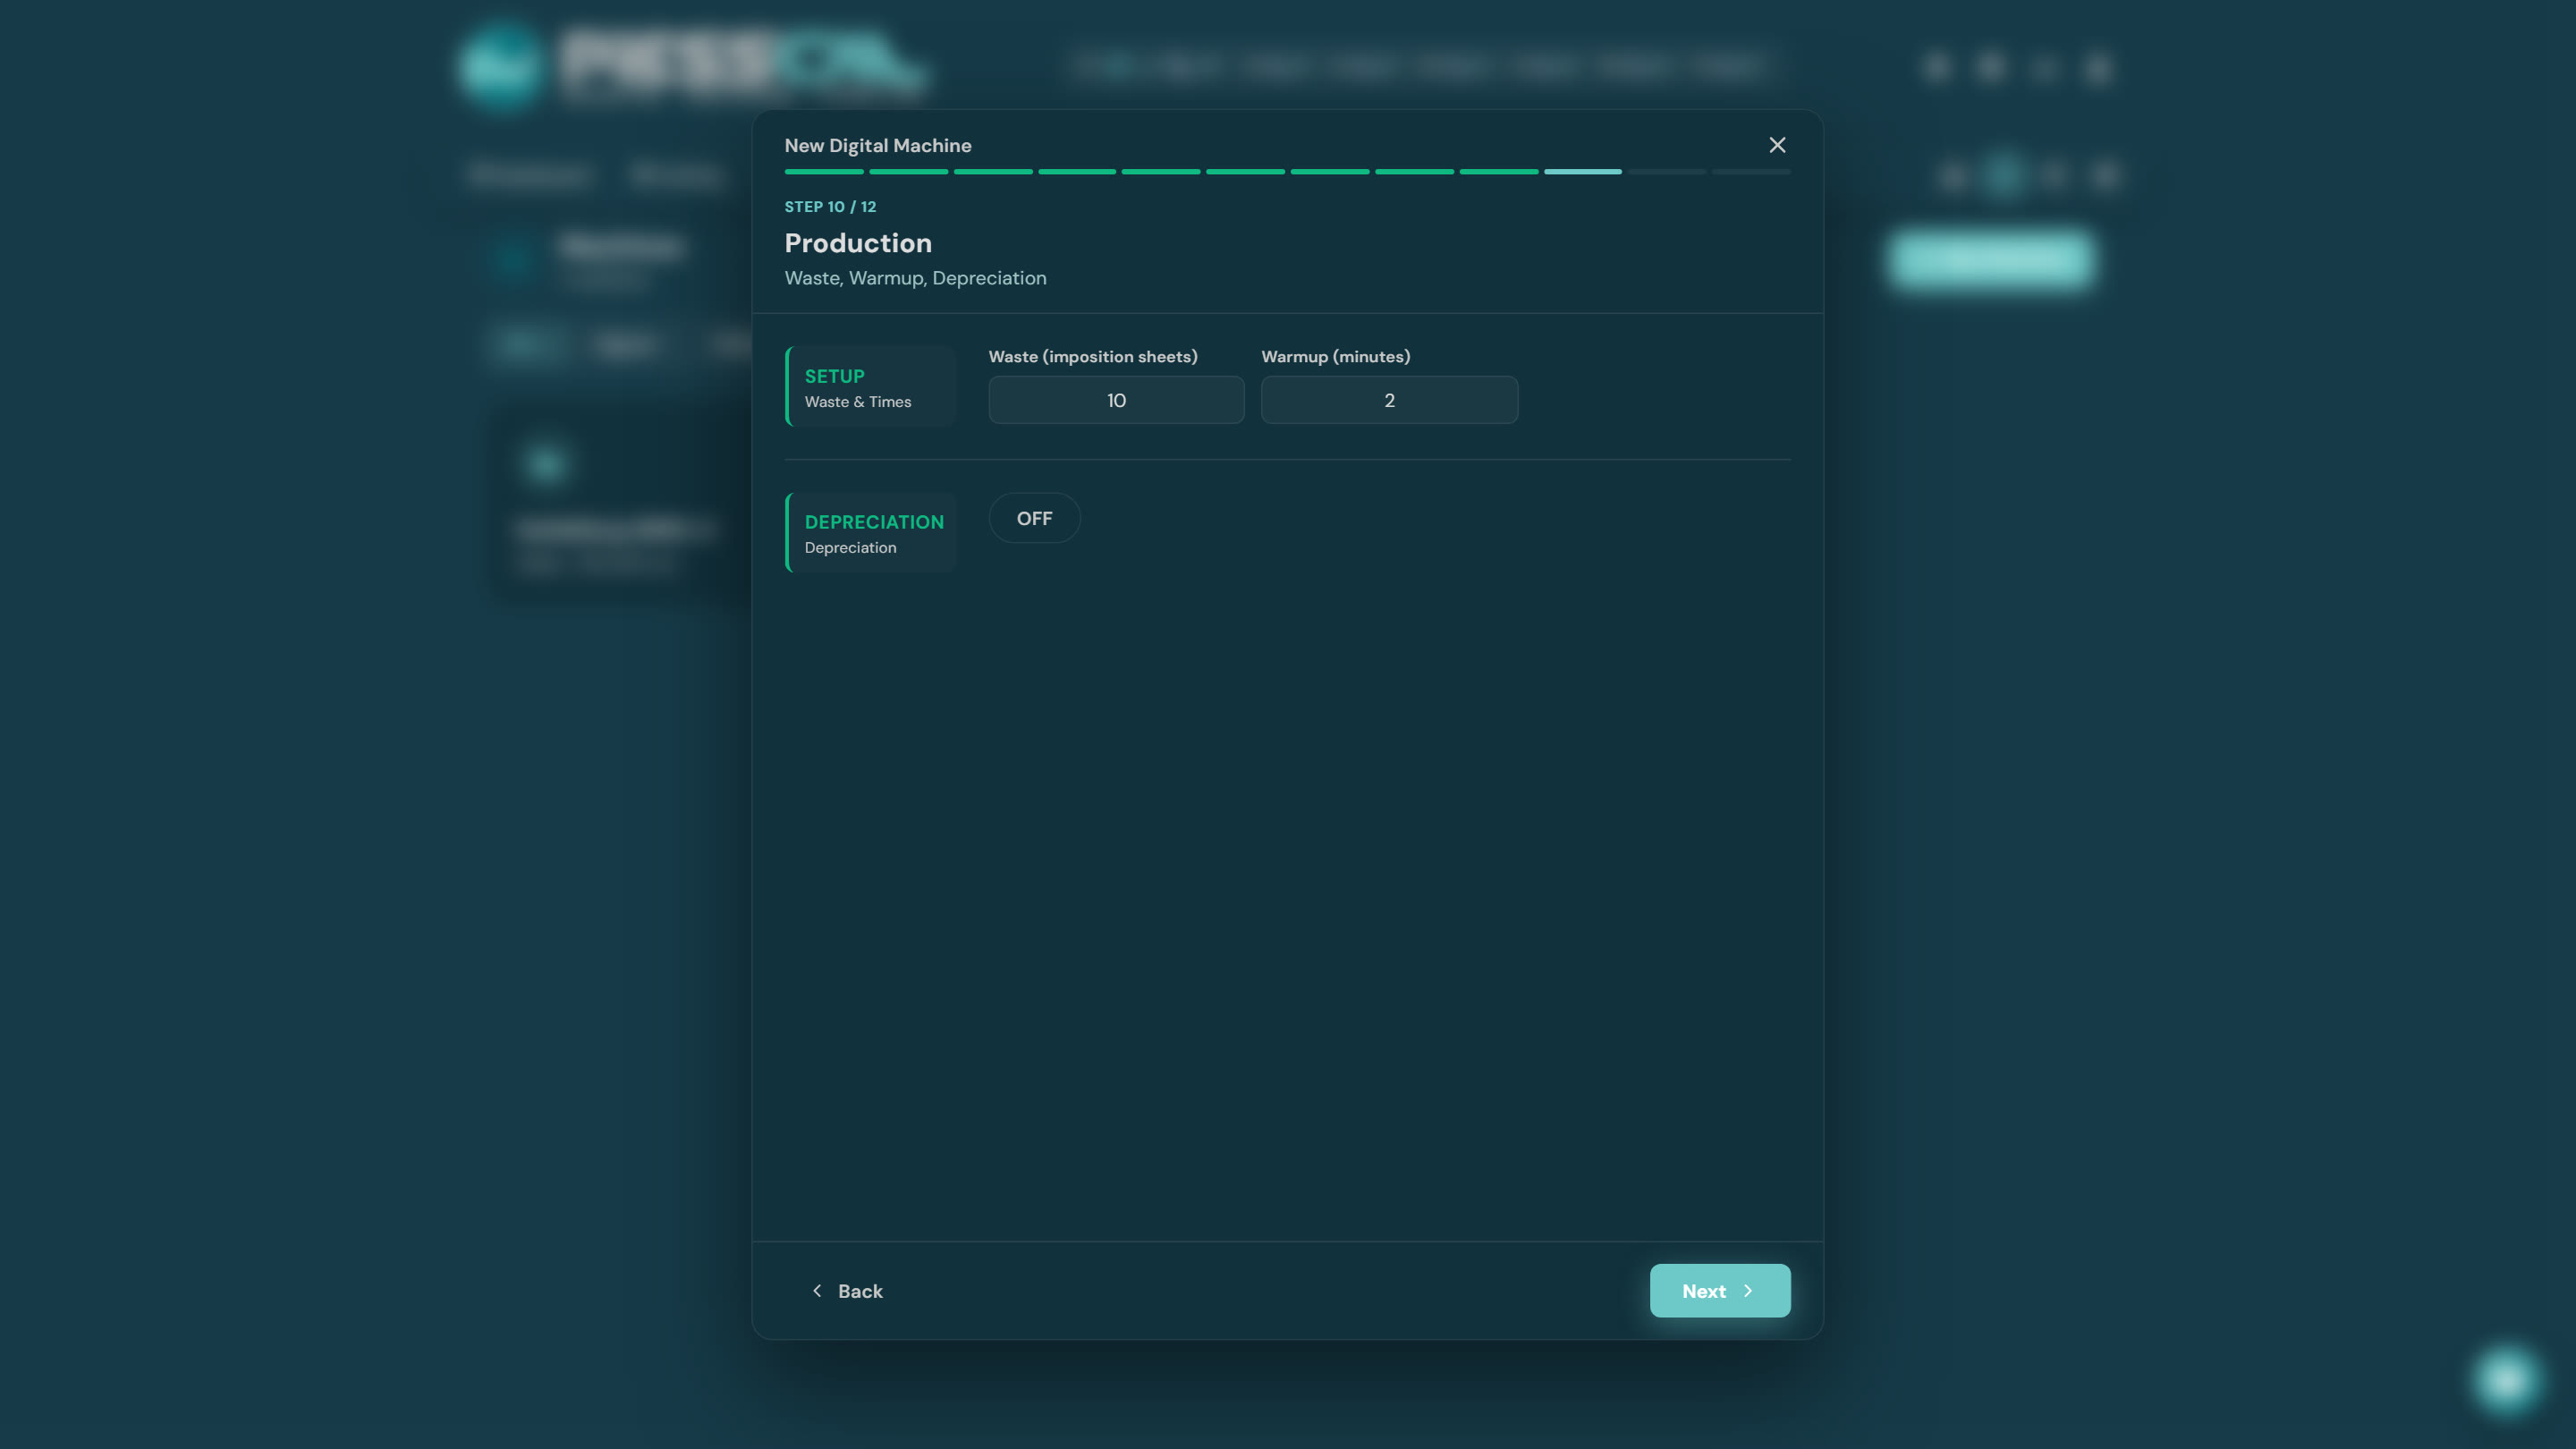
Test sheets per job (realistically ~10 for digital), setup time, and optionally depreciation — spreading the machine's purchase cost over its prints.
Steps 11-12 — Maintenance & Technicians
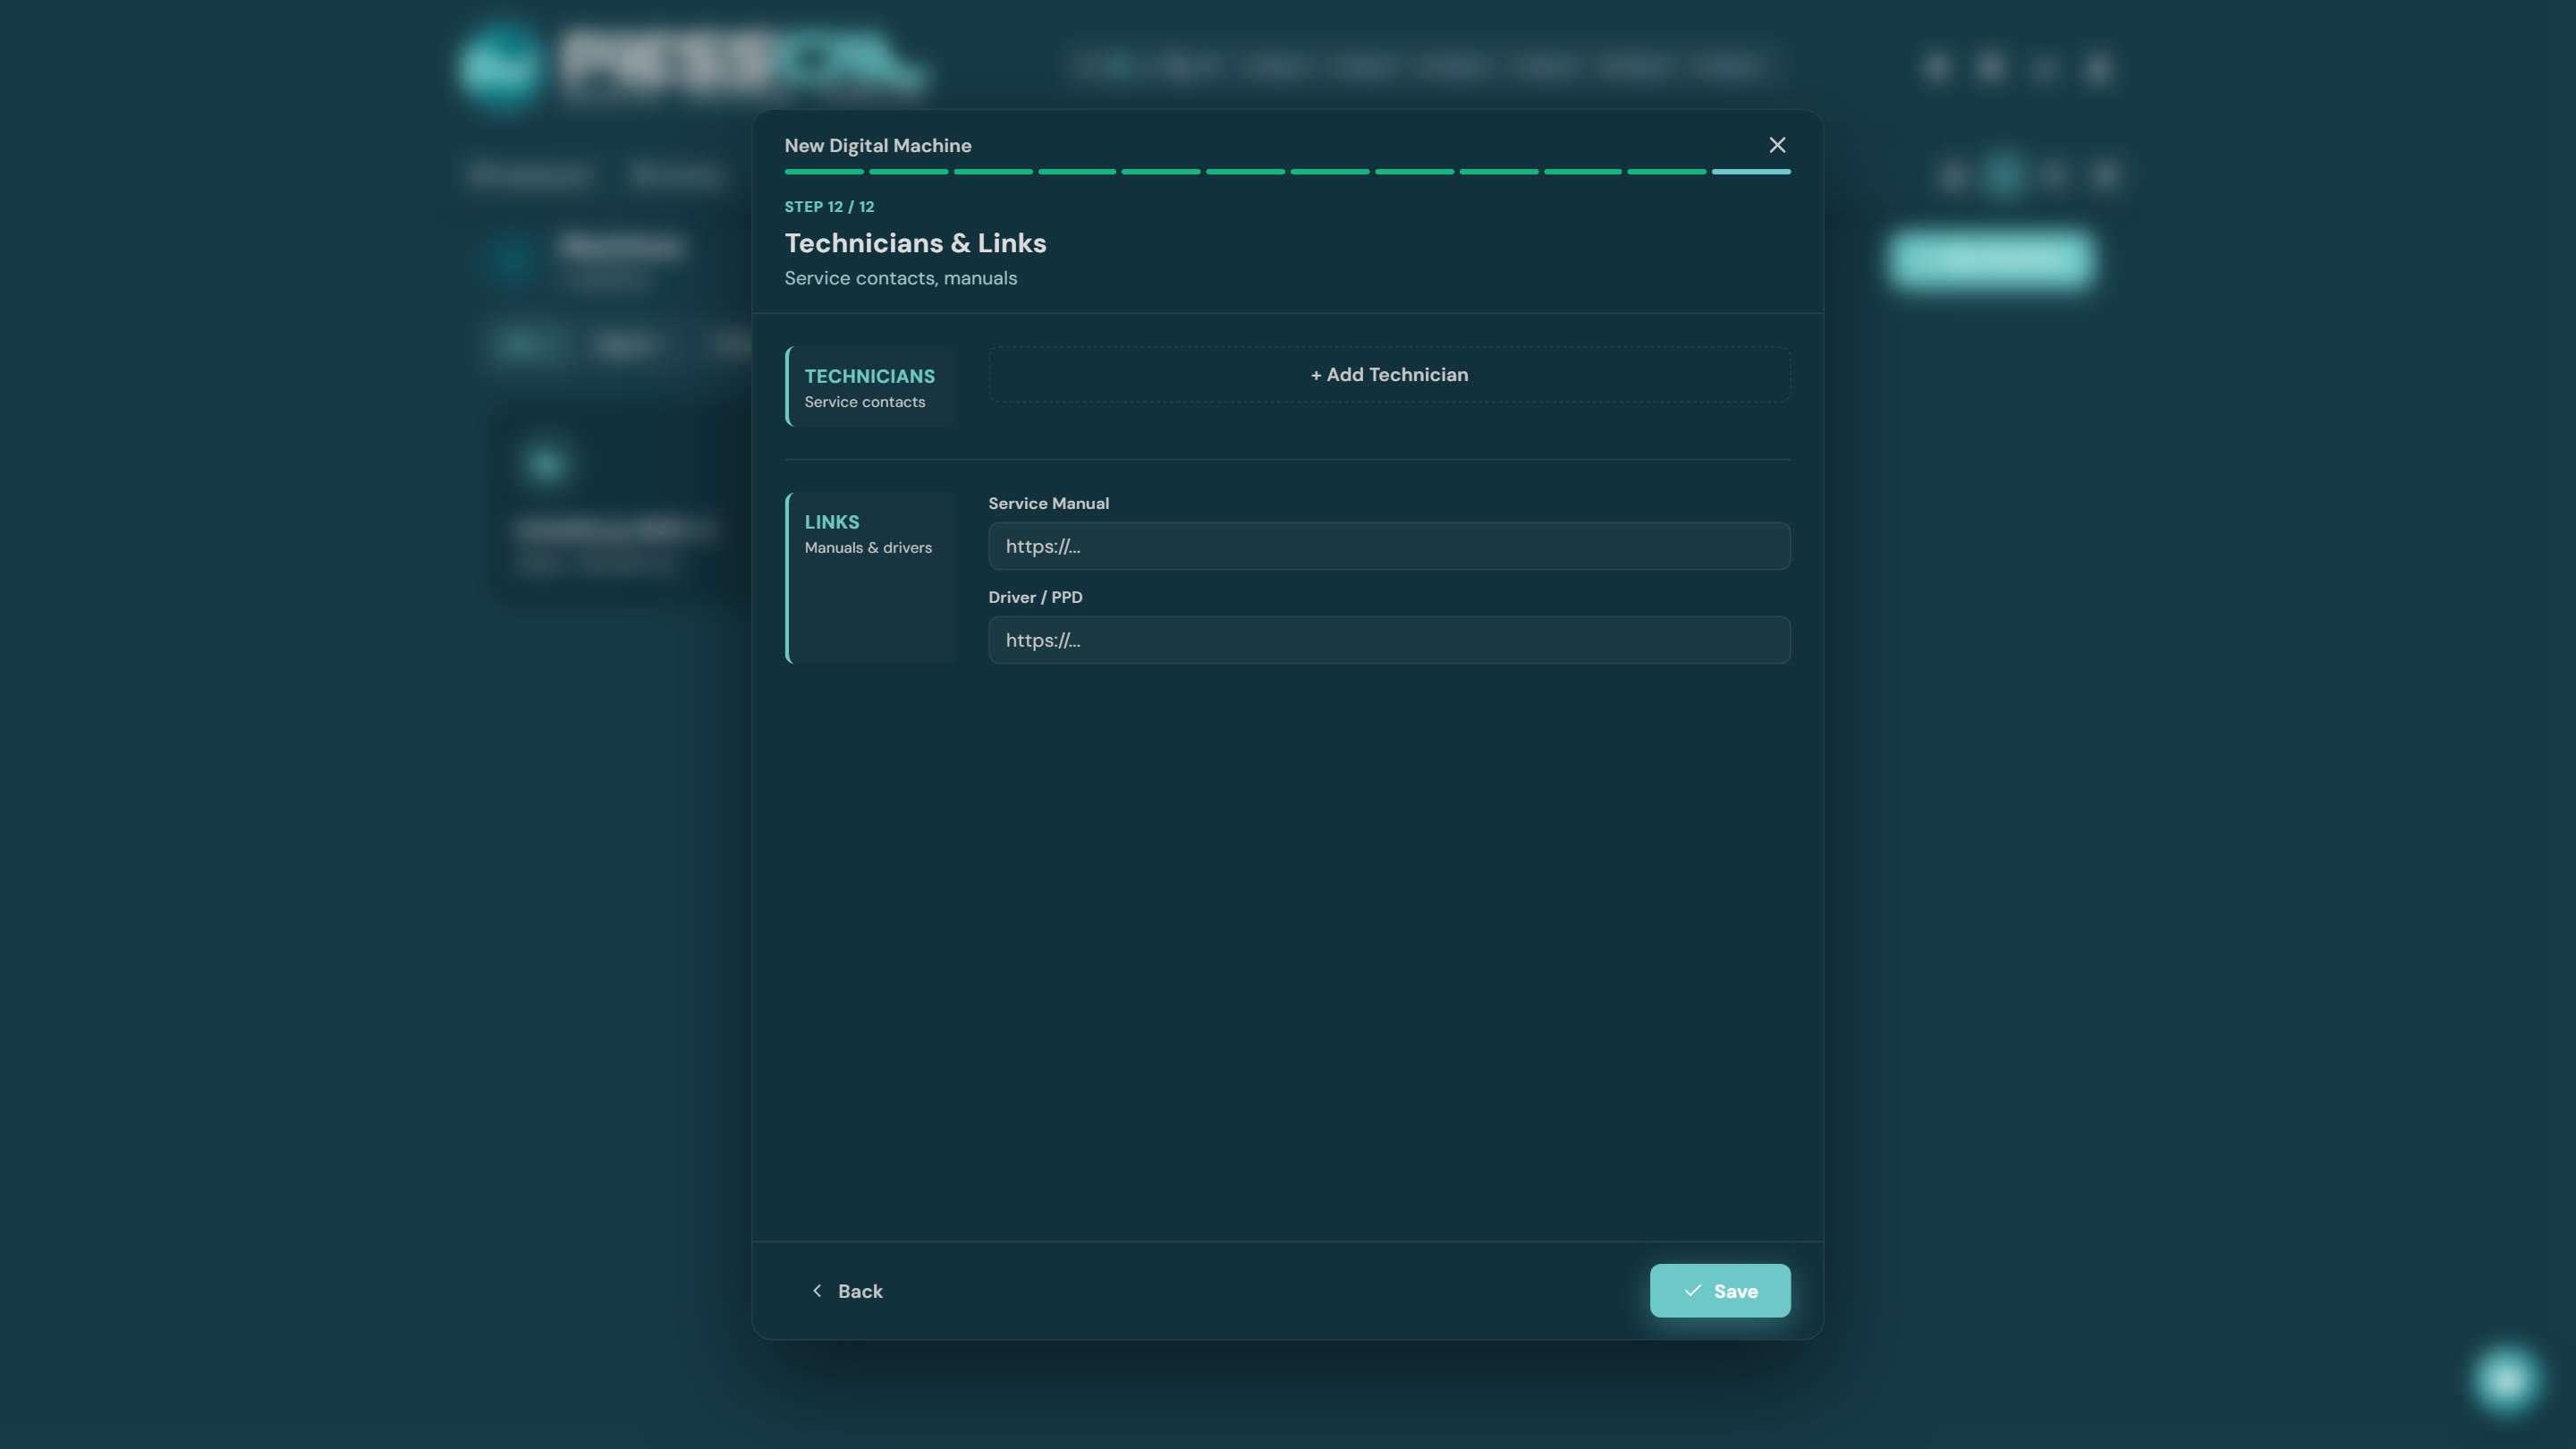
Service counter and log, technician contacts (phones, email) and links to manuals. Optional — but the day the machine flashes a red error, you'll be glad it's all in one place.
After you finish
Hit "Save" and the machine appears in the calculator immediately. Run a test costing with a job you know well — if something looks off, go back into the machine and adjust: every step stays editable after the wizard.